After a brief summer hiatus, we finally come to the conclusion of our Essential Travel Gear series! In our last two posts we’ve covered essential travel gear for keeping your money safe and the best electronics to take for world travel. Now it’s time to talk about the little things that make a big difference in the long run. When it comes to staying healthy and keeping clean, a few little pieces of gear can make all the difference. Let’s take a look inside our bags... Massage Ball/Lacrosse Ball
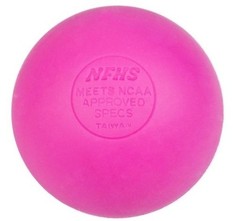 This might win the award for least expected, most amazing/useful gift received on our travels. When we first started out on our trip, we dropped by Columbus to visit our friends Nat & Rayn. We had a great time visiting food trucks and eating delicious meringues. Nat is a massage therapist and before we left he gave me a simple lacrosse ball. He said I could use it to work out knots on the road. OMG, was he right! This little ball has been our constant companion – you can roll your feet on it at the end of a hard day for instant relief, or put your back to a wall with the ball there to massage out knots in your lower or upper back. Calves cramping after a long day of walking? Rub the ball along the line where the shin meets the muscle and feel the aches melt away. Costing nearly nothing, this is a must have for any travelers! Thanks Nat!
Resistance Bands 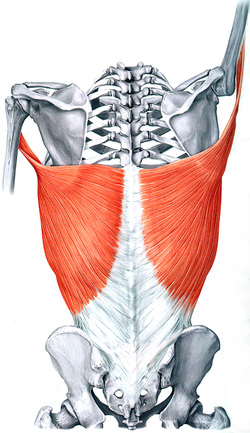 Those pesky lats Those pesky lats As we traveled, yoga was our primary method for staying fit. After all, with yoga you only need a small space on the floor or ground to get a full body workout. But there are a couple muscle groups that even the most intense yoga workout leaves relatively untouched - mainly the biceps and the latissimus dorsi (back muscles). Typically you need equipment only found in a gym to work those muscles, which isn't available when hopping around the globe! By doing push-ups on the floor of your hotel, you can keep your pecs (chest) and triceps (the back of your arms) healthy and toned while traveling. But there is no easy way to work out your back and biceps. This is where the bands come in. To work both lats and biceps at one time, find a tree or a sturdy radiator in your room and wrap the band around it. Then grab each end, bend your knees slightly, and pull the band towards you. You want your elbows to scrape along your ribs and to pull your hands back to your ribs. This “rowing” motion will work both your biceps and your lats.
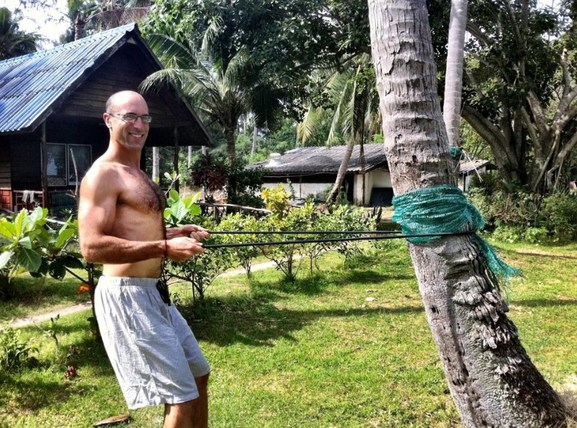 Jeff demonstrating proper rowing technique using a coconut tree in Koh Lanta 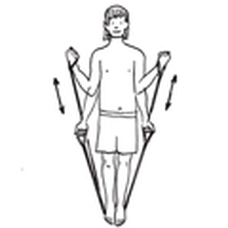 Alternatively, you can stand on the band and do bicep curls like the picture on the right. Simply spread your legs further apart to work the biceps more (though this movement will not work your back like the above movement). By doing this and push-ups regularly you would never know I hadn’t been to a gym in over two years! Resistance bands come in different lengths and levels of tension, but the ones we used are made by Fitness Gear (click here for the link). We particularly liked these resistance tubes because you don't need the handles, which are unnecessary when trying to pack ultra-lite. Just build up your wrist strength and grab the ends (like the in the picture above) without handles. I used the "heavy" band and Neda used the "light" band – they easily fit around the circumference of our Porter packs.
Washing Line
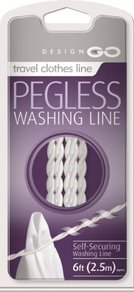 When you’ve only got two days in a place to explore, I guarantee that you’re not going to want to sit and do laundry while time passes by. And if you are traveling ultralite, it often doesn’t make sense to pay to get a whole load done. So you end up washing a lot of shirts and underwear in the sink with a bar of soap. But what to do about drying? That is where a clothes line ends up making life a lot easier. Just a simple piece of thin rope can do, but I like a design like this GoTravel Pegless Washing Line. It has hooks on either end as well as suction cups that can attach to the hooks, giving you maximum versatility. We could put the hooks around an outside balcony and dry our clothes or if no balcony, suction the ends to the bathroom tiles. It’s a tiny, but very useful thing for long-term travelers especially!
Vibram Five Fingers
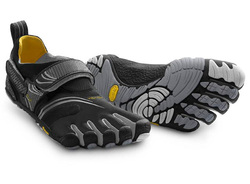 I mentioned these shoes in a previous post, but they deserve one more glance. The Vibram Five Fingers are quite popular now as a “minimalist” running shoe. The sole is so thin that it is almost like walking barefoot, and supporters say that it strengthens muscles in your feet that regular shoes don’t and encourages correct form in walking and running. I don’t know about all that, but I do know that they weigh nearly nothing. Neda’s model was the Bikila Shoe, weighing in at 7.5oz and Jeff’s the Komodo Sport (pictured), which at nearly double the size, still weigh in at only 14.5oz! Compare that to an average athletic shoe and you are saving 1.5-2.5 pounds of weight!
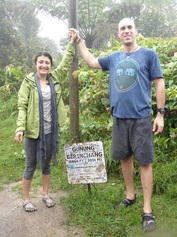 The Five Fingers at the top of The Five Fingers at the top of
Gunung Berinchang, Malaysia The shoes really shine in their versatility. Forget about heavy hiking boots – we used these to climb the highest peaks of New Zealand and trek through the thickly wooded jungles of the Cameron Highlands in Malaysia. We used them as water shoes for snorkeling (though they don’t recommend that) and of course as shoes for morning runs. Want to do yoga outside? These are a great solution. And when you think about all the things you can do with that extra 2lbs of weight, they really are a no-brainer for travelers. We loved our five fingers!
Straightening Iron
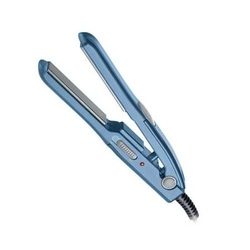 From trekking through jungles to navigating through the humidity of India, it is hard to keep your hair looking good! One of Neda's favorite little tools was this mini straightening iron. It is so powerful, that she was able to straighten all of her hair with it and smooth the frizziness away! She knew she made the right choice, when she found out that fellow traveler and hair stylist, Shea, also wouldn't travel without her mini BaByliss PRO Nano. This tool is so small that it just fits on the side of the pack and doesn't take up any extra space or adds any weight. It is also dual voltage to be used worldwide with the appropriate adapters.
That wraps up our series on essential travel gear for trotting the globe. Hope that this gear helps you on our journey and have a great trip!
Mini-Speaker 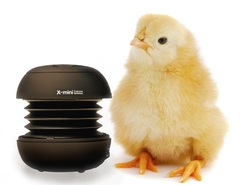 If you’re a music fan, then a mini-speaker is an essential piece of gear on your travels. Single capsule speakers like the X-mini produce great sound while weighing almost nothing. I can’t count the number of times we ended up hanging out with other travelers and used our mini-speaker to turn the night from hanging out into a full blown party! Yeah, your phone has a speaker, but once you hear what these tiny things sound like, you’ll be converted.
Smartphone 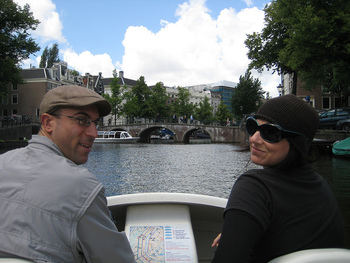 Shea & Jeff in Amsterdam Shea & Jeff in Amsterdam The debate about the best smartphone rages over the web and is outside the scope of our humble travel blog. We carried an unlocked iPhone 4 for the whole two years and it performed admirably. But I want to focus on two particular features/apps that really made this an indispensable piece of travel gear beyond its functionality as a phone. Firstly, the locating function of the phone can work even without a Simcard through the use of cell phone tower triangulation. This is brilliant because even without internet, you can locate where you are and find a location you’ve previously tagged. All you need to do is use free wi-fi when you have it to tag ahead of time things like your hotel, a train station, a restaurant, or a museum. Then when you are out and about, simply pull up the tagged locations and you can see where you are in relation to them. We used this function all the time and we were never lost no matter where we traveled. A big shout out to Shea McJagger for the tip!
 ProHDR Shot of ProHDR Shot of
Marian Lake, New Zealand Regardless of your phone, the most used app for us by far was ProHDR. Available for iphone and android this app allows you to take brilliant HDR photographs. For those of you unfamiliar, HDR means high dynamic range and is the process of taking a picture at different exposures and combining it to achieve one picture with great lighting effects. For instance with a normal compact camera, you might snap a photo with light exposure that makes the person in the foreground look good, but washes out the beautiful sky behind them. With ProHDR, it takes two pictures at different exposures and then automatically combines them on the phone, bringing that sky out in vivid blues. Before this app, it would take hours on photoshop to produce pictures of such quality. I’m not saying that it is exactly as good as photoshop, but considering it takes only seconds and costs a mere $2, this app made travelers with thousand dollar cameras envious. If you like taking photos, it’s a must have and was another recommendation from the illustrious Shea McJagger – you rock girl!
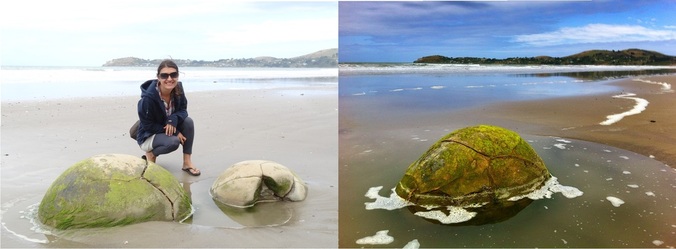 As you can see from these shots at the Moeraki Boulders in NZ, the difference between ProHdr and a regular camera can be the difference between a bright blue sky with clear foreground and a washed out, fairly colorless shot whose exposure is all wrong. Joby/Portable Tri-pod Even with the ProHDR app, there are times when you will want to zoom or have to take pictures with a higher megabyte content. Probably you’ll take along a compact or even larger SLR camera with you if you like to take snaps. I won’t recommend a particular camera here as they change all the time and you can get better information online, but I will recommend an accessory for any camera – the Joby! 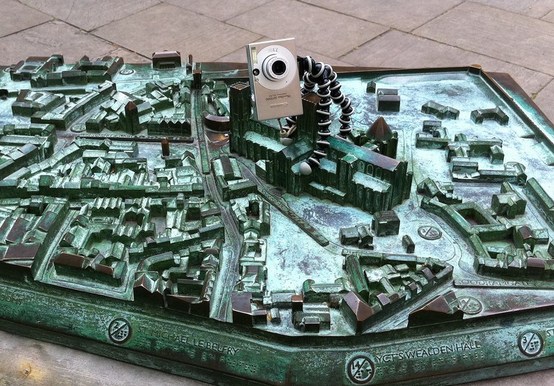 Our Joby attacks the scale model of York in order to snap the ideal shot This flexy-legged tripod was great for taking pictures of the two of us when no one was around. It could attach to trees, be sturdy on rocks, or hang from any random thing you can find to get the shot you want. We used the little one for our compact, but there are larger ones as well if you’re committed to carrying a big SLR camera. Netbook or Tablet? Most travelers we met had at least one smartphone with them, which is smart given its versatility and small size. But the question of what other major electronic device to carry is an open one. As tablets have increased in popularity, they make a good argument for usage while traveling due to their small size. But after extensive research, Neda & I decided to go with a small netbook instead, and we were happy about the decision. For us, here are the advantages of the netbook over a tablet:
- A typical netbook provides 250GB to 320GB harddrive. This is plenty of space for backing up your photos while traveling. A typical tablet is between 8-64GB of storage, and doesn’t allow you to store things like pictures.
- A netbook has a keyboard attached making things like writing blogs easier.
- A netbook allows you to install any software you want like Microsoft Office, Photoshop, etc.
- A netbook is maybe a third or fourth of the price of a tablet, making it less costly if you lose it and easier to replace.
So there you have our top tips for making the most of your electronics while on the road. In part 3 of the series, we’ll tackle the best gear for health and grooming while traveling. See you there!
Whether you are preparing for a globe-hopping trip or just a two week stint in a foreign land, having the right travel gear can be the difference between stress and relaxation. We did lots of research before our trip and also got some great advice from travelers along the way. Now we want to share with you the most useful gear we used for traveling the world, especially when you want to keep things light and cheap.
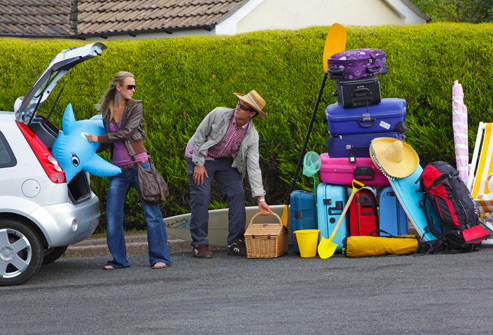 These folks didn't follow our packing list...tsk tsk tsk In Part 1, we’ll focus on gear that keeps your money safe, perhaps the number one concern for a traveler. Of course, the bag you bring might be the most important aspect of your travel gear, but we covered that in our last post on How to Fly Around the World Without Ever Checking a Bag. Wallet
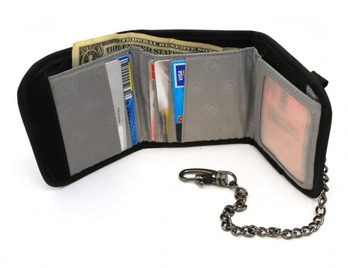
I admit that I’m a pretty picky wallet guy. I don’t like anything too bulky but I do like lots of areas for storage. I guess I like to have my cake and eat it too. With the Pacsafe WalletSafe 100, I was able to do just that. This tough nylon wallet’s main security feature is a metal chain that connects to the belt loop of your pants via a secure hooking mechanism. It comes on/off easily and allowed me to be much more relaxed walking through cities. No pickpocket could get this wallet without clearly alerting me to the attempt. It is easy to clean and has enough pockets for many credit cards as well as a nifty little zip pocket for change that I used all the time. Also, if you don’t want to use the chain, there is a velcro pocket to store it in. Since I always use it, that velcro pocket comes in handy for random little things you want to keep safe, like a key for instance. An important note about wallets – I only ever kept a bit of cash, one credit card, and one ATM card in the wallet – everything else went in the security pouch (see below). Security Pouch
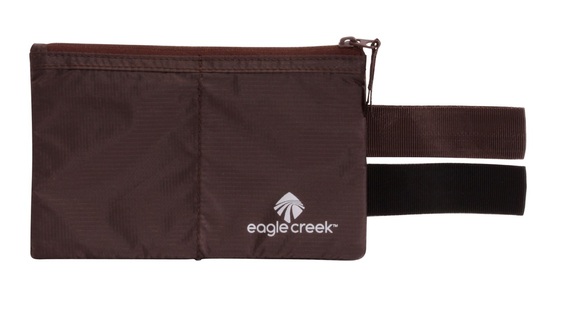
 Even with a secure wallet, there are still some things you don’t want to leave within reach of a possible pickpocket attempt. Things like your back-up cash & credit card, passports, and maybe the keys to your travel locks. When I traveled around Europe ten years ago, I used a security pouch that hung around my neck. But stuffed with passports it was visible through my shirt and also was pretty obvious when taken out. For this round, I bought an Eagle Creek Hidden Pocket, and it worked wonderfully. The hidden pocket attaches to your belt and goes down your pants right behind your front pants pocket. It is large enough to hold passports and has two little pockets if you want to put things like passport photos or folded up cash inside. I found that even with 3 passports and cash inside, I could wear it all day with jeans without it being uncomfortable. Also, to take it out you can just reach down and flip it out – much less noticeable than pulling a big pouch out from under your shirt. If you are worried about leaving passports in your room or if you are staying a hostel – the security pouch is an essential and inconspicuous piece of gear.
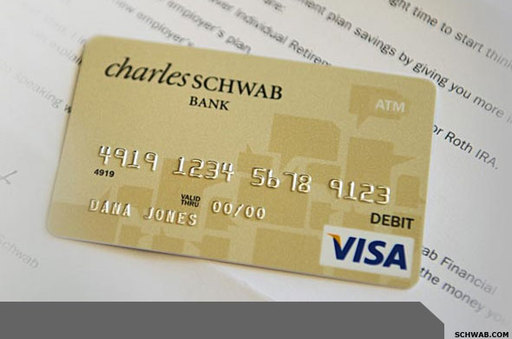
No fee ATM Card When traveling it’s obviously best not to carry large amounts of cash at a single time to prevent loss in the case of theft. The problem is that banks like Bank of America charge an arm and a leg to take cash out internationally. Not only do you pay the fee for the ATM, but Bank of America charges you their own fee as well. That means that it can often cost $10 or more just to take out some cash! While there are several ATM cards that offer rebates, after research and two years of use, my recommendation is the Schwab Bank High Yield Checking Account. Opening an account with Schwab is free and there is no minimum amount of money required in the account, so there is nothing to lose. It is easy to connect your Schwab account with other accounts (like your Bank of America) so you can transfer money to it electronically while you travel. This way you don’t have to keep a large amount in your Schwab account for peace of mind in case the card is stolen or somehow utilized (which is unlikely with the pin code). But the true highlight of the card is that it can be used at any international ATM and that it reimburses all ATM fees you are charged! In Thailand the charge was usually about $5, so at the end of each month our statement would show $30-$50 of ATM fee's returned back into our account!
This is particularly nice because now you can just take out smaller amounts of money at a time. I remember when using a traditional bank account while traveling I used to take out large amounts of money each time because I didn’t want to keep paying fees. With the Schwab card you don’t need to worry about that anymore. Honestly, with all the fees in the US these days, the card is great for domestic use as well. I tried it out at one of those private ATMs in a bar in the states and sure enough got the $5 debited back to my account at the end of the month. There is nothing to lose and only ATM fees to save – so why not?
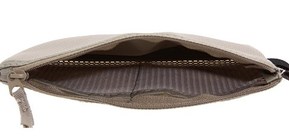
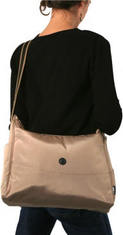
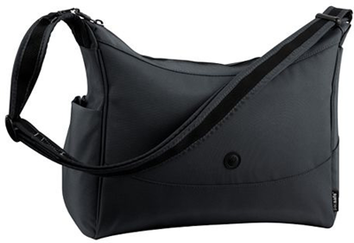
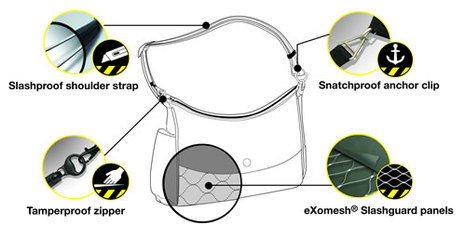
Purse/Messenger Bag Last, but not least, a secure purse/messenger bag, is a great piece of gear for any traveler – man or woman. While the wallet is the go-to for cash and cards, the purse can hold all sorts of essential gear while traveling like keys, phone, headphones, etc.. But when walking the crowded streets of a 3rd world country, it can be hard to feel secure with any purse. For us the solution was CitySafe 200 Shoulder Bag, which we nicknamed “the tank”.
The CitySafe 200 contains a stainless exo-mesh under its water-resistant nylon exterior, making it impossible for a thief to slash the bottom or side to gain access. The shoulder strap also has steel reinforcement and comes with a brilliant security feature. One side of the strap detaches with a metal hook and allows you put the strap through a chair or other fixture. This was crucial while at bars or restaurants, where we didn’t want to always have to keep one eye on the purse. We could simply affix the bag to one of our chairs and be sure it wasn’t going anywhere.
 Other key features of the purse are the intelligent ways the pockets are designed so that the direction in which the main zipper opens is the opposite of the way in which the security pockets within open. In other words, if a thief manages to open your purse (which is unlikely since the main zipper has a small hook on the end that needs to be detached in order to open), he/she has to reach all the way across the purse in order to then open the internal pockets. Add to that a pocket that blocks RFID readers and you’ve got a portable safe on your hands. Neda would usually carry the bag for everyday use, but if we felt we were in a dodgy area or on travel days when we were more exposed, I could carry the bag on my front with my arm on top and it would be near impossible for a thief to access.
So there you have it - all the essential travel gear we used for keeping our money and valuables safe. Let us know how it works for you if you use any of it. In part 2, we’ll discuss the best electronics for the savvy traveler. See you there!
Over the last two years we’ve taken 26 flights, of which 18 charge for checking baggage over 10kg (for some as low as 7kg). Yet with careful planning and a bit of bravado, we never paid for a single checked bag on our trip around the world. We’ve gone back and looked at each airline’s baggage fees and calculated that by not checking bags, we saved $1,182. That’s a lot of sushi rolls, plates of Pad Thai, or bowls of curry! So what’s the secret to spending money on YOUR travel and not the travel of your bags?
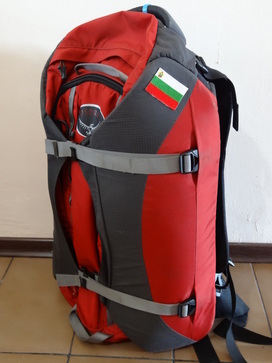 Neda's Porter still looks good after 2 years! Neda's Porter still looks good after 2 years! The Bag – Your Life in 22” x 14” x 9” Nylon ShellThe first step is getting the perfect luggage for a traveling vagabond. For us the research distilled down to the Osprey Porter, an amazing travel pack for several reasons. Firstly, it is the exact dimensions for carry-on luggage around the world. To help with making sure the pack fits into the little metal measuring cage the airline check-in staff sometimes make you put it in, the Porter is equipped with two compression straps. The straps have two settings for either mild compression or for full compression. We found that when “fully compressed” we could not only fit the bags into any plane, but often just threw them overhead onto buses as well. This was particularly nice in places like India where we had our packs inside the bus while other travelers had to tie their packs onto the roof!
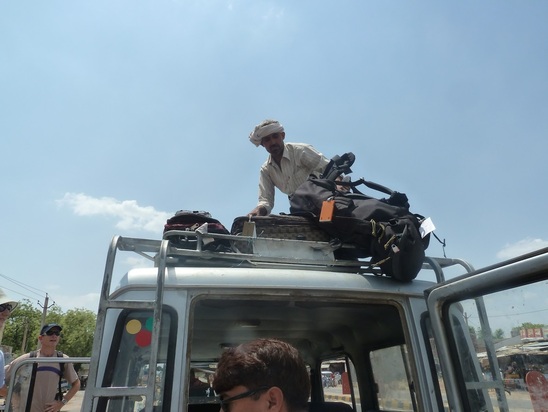 This is where you don't want you pack!
Courtesy of http://www.tryanythingonceblog.com/tag/packing The Porter can easily serve as a weekend duffle because the shoulder straps hide behind a back panel. For our purposes, we almost always carried it on the back, and found the straps to be amply comfortable for up to about an hour or so of walking. This isn’t the ideal pack if you plan on walking the Camino de Santiago, but for walking around town to find your hotel, it’s no problem and its smaller size encourages you to take less in the first place! Still, we found the spacious main compartment large enough to fit all of our travel gear, with some deliberate planning. 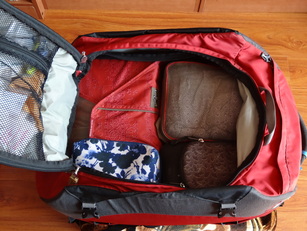 Our Pack Set-Up Our Pack Set-Up Become a PackratA good packing system perfectly complements the layout of the Porter and will have you breezing through airports. We used one folder and one half cube of the Eagle Creek “Pack-It” system. The folders vary in size (we used the 15” inch size for Neda, who is a fairly small girl, and the 18” size for Jeff who is 6’2”), and neatly fit jeans, shirts, sweaters, and the like. The cube fits all the small stuff like underwear and socks. On top of the cube there was room to put a small zipping bag (my mom had gotten it from a make-up promotion) where we kept computer charger, phone charger, and other small electronic stuff. Next to the half-cube we put a deluxe size REI toiletry bag. While it looks like that isn’t available on their website any longer, this one http://www.rei.com/product/834727/rei-grande-shower-kit, seems similar. Once you’ve got all that in your pack, there is still room to put a pair of sandals and a pair of Vibram Five Fingers, which were a perfect travel sized athletic shoe. We could run, snorkel, and hike in the five fingers all while carrying around only 14oz of weight for Jeff and 7.5oz for Neda! Finally, on top of the shoes we squeezed our Osprey Daylight Daypack, which we used for our day hikes and trips around the cities. The pack is supposed to be able to “add-on” to the back of other larger Osprey packs, but we found that for the porter we could just stuff it in on top of everything else and it would work just fine. We only used one daypack as Neda usually carried a pursue with more secure things inside.
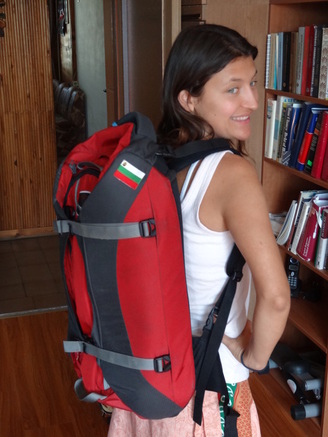 Look how small my pack is!? To recap, if you want to be an “ultra-lite” traveler, there isn’t room for many extras. My wardrobe while traveling consisted of 5 shirts (one of which doubled as a workout T and backup when everything else was dirty), one pair of shorts, one pair of jeans, a fleece (for cold weather destinations) and a jacket. It’s not much, but it makes picking your outfit pretty easy!
 eVest packed to the brim eVest packed to the brim
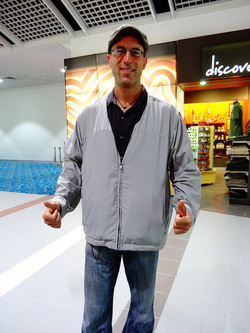
on our way to Tokyo. Making Weight – the Scott EvestWe’ve talked above about the size of your luggage, but these days it’s not just the dimensions that have to work to be able to carry-on, it’s the weight as well. Most airlines allowed us 10kg, though on discount carriers that did not include a “personal item.” So the old trick of stuffing the purse wouldn't work. All 10kg have to be in one bag. Some of the worst airlines only allowed 7kg per person! We usually would wear our heaviest clothes like jeans and walking shoes on travel days no matter how hot it was outside. But our secret weapon in making weight was the Scott Evest. The jacket is designed with 20 sturdy pockets that can fit all kinds of things inside. On one side, there is a big pocket where I would put our netbook; on the other side, the bag filled with chargers.
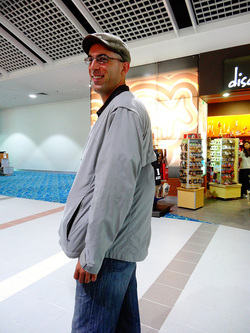 Can you see the sandals in the Can you see the sandals in the
pocket on the back? In the back there is an extra pocket where the jacket can fold into itself and become a pillow (great for long bus rides!). But I used it to store my leather sandals, since they weigh a little over a kilo. Other pockets would hold heavier knick-knacks like our travel locks or my electric shaver. With one of those flights that limited us to seven kilos, the travel-vest managed to carry along the other five without being noticed by airline staff! Beyond its usefulness in the airport, I thought the jacket looked pretty snazzy and managed to keep me pretty warm even in chilly environments. It’s an all around great piece of travel gear, though it does come in at a rather steep $135 for the standard version I had. Which brings me to the next point of order…my family got us a bunch of different gifts to support us along our travels and we used all of them, but in the end the travel vest has to win the award for most useful. Thanks Dan for all the research (and cash) you put into it. You were with us in spirit the whole time!
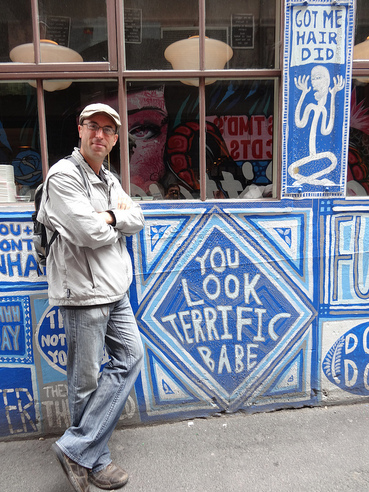 Travel Vest in Action - this pic is street art in Melbourne.
Also note the small daypack on my back 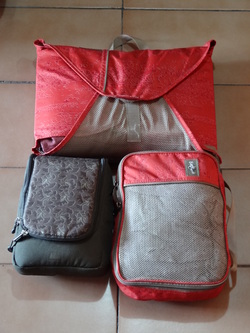 All of our clothes and toiletries All of our clothes and toiletries Psychological Warfare – Passing the various checkpoints and getting onto the plane
O.k., so you’ve got all your fancy gear and you’re packed up and ready to go. Only with the extra souvenirs you bought, you realize that your pack is 12 kilos even with the E-vest loaded to the brim! What to do? It’s happened to us a few times and here were our strategies for getting through the airport:
* Wear layers – I would wear a shirt, the fleece, and the evest to keep the pack’s profile down. Not the most comfortable, but sometimes necessary
* Do a “counter drop” – when Neda & I would walk up to the counter to check in, she would let her purse drop to the floor and I would be carrying the daypack (with the extra weight in it) in my hand and also drop it. Usually the staff don’t see the bag since it’s not in their line of sight. Then, when they ask us to put the bags on the scale to be weighed we can make weight. 90% of the time the only weight check is at that counter, so if you can do a successful counter drop even when you know you are over weight, you’ll have a good chance of getting through. It's a bit sneaky, but so is charging us 30 euros for an extra two kilos!
* Wear the packs on your back – you’ll probably do this anyway, but we found that when most airline staff glanced at the packs they never even asked us to weigh them – they look more like school backpacks than luggage!
* Be ready for other checkpoints – a few times I took my fleece and jacket off and carried the computer in my hand since it can get hot to wear all that stuff. Once, right before security, they did another weight check. Luckily the computer was hidden under the fleece so it looked like I was only holding my jacket (which they don't make you weight) because I only passed that check by .3 kilos!
Lighten Up
So there you have it folks – the gear and the strategy for saying goodbye to airline baggage fees forever. If you hadn’t noticed, it does require a certain commitment to the ultra-lite traveling lifestyle. Simply bring less stuff when you travel and make everything you have count. The longer we traveled, the more grateful we were for that decision and with each leg we found we brought less and less. It’s liberating to be able to fit everything into such a small space and gives you so much flexibility when riding buses, taking taxis, and walking around town. Though we used this gear for world travel, we are committed to using it whenever we travel from here on out. So get to it and have a great time! Happy trails!
|
 RSS Feed